Thursday, October 30, 2008
I'm Baaaccckkk!
Just a shout out to the west... I just got back from Cali and I'm still coasting off a great time. So here's to sunshine, good food and all the west coast music they didn't play-(yikes)- what's that about? Anyway enjoy!
Tha Blue Carpet Treatment
Wednesday, October 22, 2008
You Do The Math...
 OK... I get my hair done once a month (I know not hardly often enough, but here's the point...) every time I go I get a wash and set and a deep condition. Check this... A deep condition usually runs about $10-$15 depending where you go. Most salons these days actually sell the same products they use on their patrons TO their patrons.
Here's what you do... Buy a bottle of the conditioner your stylist uses on your hair from your stylist. Then, at your next visit(and visits to come) bring that same bottle instead of having them use their own. More than likely they won't charge you for deep condition... or it will be considerably discounted... JUST ASK 'EM! All pricing of course will vary, but where there's a benefit is undeniable. Make sure you do the calculations specific to your salon and it's conditioners to maximize your savings.
Here's the breakdown for my salon...
Standard deep conditions are $10- if I bring my own conditioner it's $3... a bottle of my salon's conditioner is $18 (sounds expensive, but look) 1 bottle of conditioner last for 5 washes or more. So, what I would pay $50 for, I only end up paying $33 (total for 5 washes @ $3 + $18 bottle) ... sometimes they don't even charge for the deep condition at all... Now dats wussup!
OK... I get my hair done once a month (I know not hardly often enough, but here's the point...) every time I go I get a wash and set and a deep condition. Check this... A deep condition usually runs about $10-$15 depending where you go. Most salons these days actually sell the same products they use on their patrons TO their patrons.
Here's what you do... Buy a bottle of the conditioner your stylist uses on your hair from your stylist. Then, at your next visit(and visits to come) bring that same bottle instead of having them use their own. More than likely they won't charge you for deep condition... or it will be considerably discounted... JUST ASK 'EM! All pricing of course will vary, but where there's a benefit is undeniable. Make sure you do the calculations specific to your salon and it's conditioners to maximize your savings.
Here's the breakdown for my salon...
Standard deep conditions are $10- if I bring my own conditioner it's $3... a bottle of my salon's conditioner is $18 (sounds expensive, but look) 1 bottle of conditioner last for 5 washes or more. So, what I would pay $50 for, I only end up paying $33 (total for 5 washes @ $3 + $18 bottle) ... sometimes they don't even charge for the deep condition at all... Now dats wussup!
Tuesday, October 21, 2008
Randomness... PR Gone Wrong!
I know I know.... lately there has been more random stuff on my blog than self-improvement, but sometimes I can't help myself. For why would she agree to this?... kinda feels awkward to watch... the rhyme is aight tho.
Thursday, October 16, 2008
Tuesday, October 14, 2008
Randomness... Beyonce's New Jawns
It's safe to consider me a fan... she's definitely got talent. Here's a peek at her "new new". I don't know what I expected and I can't determine if I like them or not, but I'll give it some more time and we'll see what happens. *side note* Is it just me or does some of the choreography (single ladies) look like a high school drill team stand routine?- I dunno.
Monday, October 13, 2008
I'm going bac to Cali...PT1
In booking for my highly anticipated voyage to Cali I came across some disturbing information... prepare yourselves... Well, in lieu of the country's current economic peril- and by peril I do mean DISASTER (but don't panic) a few airlines are charging patrons a "baggage fee" to check a bag- ANY bag (disrespectful!) No worries though... All the airlines aren't charging this fee just yet (hopefully they won't ever). So, in shopping for your ticket remember to consider the baggage fee as apart of the cost of your ticket if you plan to book with an airline that has such a fee that applies. That way you can minimize your cost and maximize your experience. Click the chart below for a list of which airlines are charging what...*side note* Videos sure have come a looooooong way 
Thursday, October 2, 2008
Fake it Til U Make it
 So, I was inspired to take the "Lauren Conrad Side-Braid" informational a step further. I realize a lot of women can't do a french braid. I touched on it a bit in the last blog entry, but here's a full-out explanation on how you too can get the French Braid look... Follow me will you (rhetorical)...
1)Mentally divide your hair into 5 sections and part the top section and braid it half-way thru.
So, I was inspired to take the "Lauren Conrad Side-Braid" informational a step further. I realize a lot of women can't do a french braid. I touched on it a bit in the last blog entry, but here's a full-out explanation on how you too can get the French Braid look... Follow me will you (rhetorical)...
1)Mentally divide your hair into 5 sections and part the top section and braid it half-way thru.
 2)Make the 2nd part and braid the top braid into the 2nd... continue through to the last braid
 3)Rubber band the end and you're done... WHA-LA!
 For a great instructional on how to do an actual french braid click here.
Get This Look
 OK so, the question was asked how to achieve the signature "Lauren Conrad side-braid" look that she is so well known for. Well hold tight and I'll show you how you too (whether your hair is long or short) can rock the side-braid with finesse...
(Sorry some of these pics are a little on the blurry side, but you can still see what I'm sayin')
1)Make a part where the actual part will fall (like if you were just wearing a side bang)
OK so, the question was asked how to achieve the signature "Lauren Conrad side-braid" look that she is so well known for. Well hold tight and I'll show you how you too (whether your hair is long or short) can rock the side-braid with finesse...
(Sorry some of these pics are a little on the blurry side, but you can still see what I'm sayin')
1)Make a part where the actual part will fall (like if you were just wearing a side bang)

2)Make a second part(to form an L) that begins at the end of the initial side-part and runs all the down towards the ear. *Don't make it too wide though. It should only be about an inch in width*

3)French braid the newly separated section down towards the ear. *If you can't french braid part and make small box-braids as you go, braiding each braid into the next*

4)Using a small rubber band (preferably a color close to your hair color) grab a small section of hair located behind the ear and the end of the braid and gather into one.


Other ways to rock this look...


Wednesday, October 1, 2008
Luk Wut I can Do
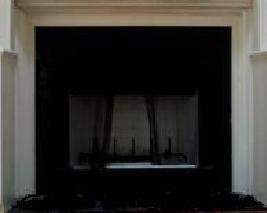
 I-ight so, home improvement is obviously something to be taken seriously. If done right the changes and updates to a home can increase the value considerably. So, naturally I decided to take a stab at it...
I bought a house a few months ago, and by a few I mean several, and it needed a few updates. For one, the fireplace was a HOT mess. Now, even though changing the fireplace probably won't necessarily add any monetary value (per say) to my spot... it couldn't hurt to spruce it up a bit, plus it just looks soooo much better... especially, since I saved a ton of dough by doing it myself (all by myself might I add). But, you can too... here are the steps I took...
1)Measure the space (I had a case left over from when I had my floors done so I just used that)
2)Measure the tile to fit the areas... There's a lot of neat ways to determine how to and where to cut your tile. Me personally, I just placed the tile, drew a line across where I needed to cut and then...
3) Cut the tile (you'll need to rent a tile cutter from somewhere like The Home Depot... you shouldn't need it for more than that day)
4)Add adhesive/mortar
5)Place the tile (let it sit for the time noted on the adhesive)
6)Mix and add your grout
7)Let it dry
I-ight so, home improvement is obviously something to be taken seriously. If done right the changes and updates to a home can increase the value considerably. So, naturally I decided to take a stab at it...
I bought a house a few months ago, and by a few I mean several, and it needed a few updates. For one, the fireplace was a HOT mess. Now, even though changing the fireplace probably won't necessarily add any monetary value (per say) to my spot... it couldn't hurt to spruce it up a bit, plus it just looks soooo much better... especially, since I saved a ton of dough by doing it myself (all by myself might I add). But, you can too... here are the steps I took...
1)Measure the space (I had a case left over from when I had my floors done so I just used that)
2)Measure the tile to fit the areas... There's a lot of neat ways to determine how to and where to cut your tile. Me personally, I just placed the tile, drew a line across where I needed to cut and then...
3) Cut the tile (you'll need to rent a tile cutter from somewhere like The Home Depot... you shouldn't need it for more than that day)
4)Add adhesive/mortar
5)Place the tile (let it sit for the time noted on the adhesive)
6)Mix and add your grout
7)Let it dry


Subscribe to:
Comments (Atom)
